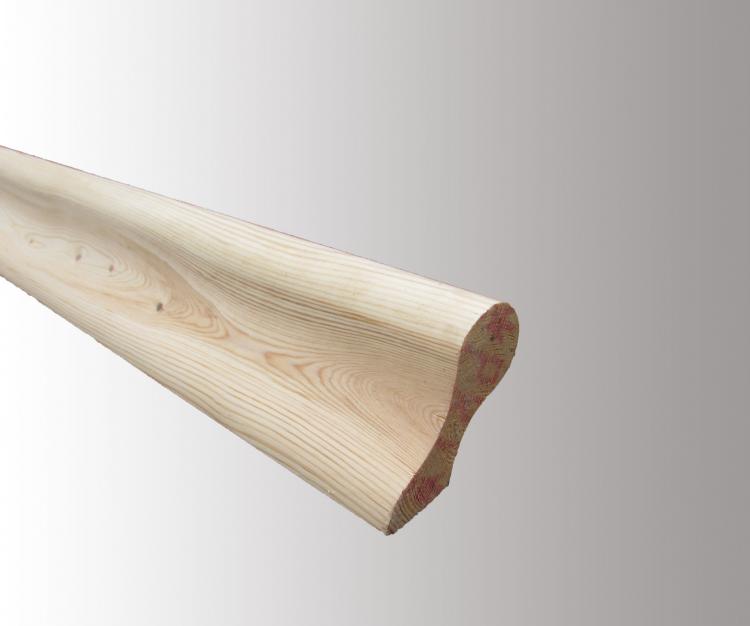
Fitting a Pigs Ear Wall Mounted Handrail to a new or existing staircase can be an easy DIY task that will make your stairs both safe and stylish. Building regulations stipulate that a staircase less than 1 metre wide should have a handrail. For staircases wider than 1 metre it is recommended that both sides feature a handrail. Whatever your scenario, a wall mounted handrail is a valuable safety feature, and they can be a useful secondary support to help younger and older family members climb the stairs too.
Blueprint Joinery stock a stylish range of solid timber handrails in a choice of pre-finished pine and oak ready for you to paint or stain. One such style of the handrail is the Pigs Ear Handrail. A Pigs Ear Wall Mounted Handrail features a beautifully turned, curved design and is by far one of our more popular products. Our handrails are supplied in 2.4 metres, 3.6 metre and 4.2 metre lengths, and are all made from responsibly sourced timber.
Below are the simple steps on how to fit a Pigs Ear Wall Mounted Handrail to a wall. You can apply these steps to all types of wall mounted handrail; the installation will be similar:
Tools Required:
- Pencil
- Tape measure
- Large spirit level
- Chalk line
- Stud Finder
- Electric drill
- Saw
- Handrail (and the screws to fit the handrail)
- We also recommend having a helper at the ready to assist with the installation.
Installation Steps:
- In the United Kingdom, regulations state that the minimum handrail height must be no smaller than 900 mm. With this in mind, on the bottom step, use a spirit level and tape measure and mark the desired height on the wall where you will eventually want to install the handrail. Do the same on the top step.
- Using a chalk line, run the line through both marked areas; the line will create a useful guideline.
- Use a stud finder to locate where the supporting parts of the wall are and where it is safe to put the weight of the handrail and fixings. Once you have found the perfect location, use the electric drill and use suitable fixings for your wall type.
- Place the handrail on the wall and measure from the end of the diagonal part of the skirting board upwards which will then create an endpoint for the handrail. Measure and then, using the saw, cut the handrail to the desired length.
- Again, offer the handrail up to the wall and then mark the rail for screw holes.
- Drill pilot holes and screw the handrail to the fixings.
- With the Pigs Ear Wall Mounted Handrail attached securely, you can now apply a finish to the handrail. You can add varnish or paint. Stand back and admire your staircase.
- Top Tip: If you are planning to paint or stain your handrail, do this before securing said handrail to its brackets. Not only will it be easier, but it will help prevent getting paint or stain on the brackets.
Blueprint Joinery offer a stylish range of solid timber handrails in a choice of pre-finished pine and oak or white primed, ready for you to paint or stain.
For more detailed information on how to fit a handrail to a wall, please check out our Fitting Instructions section on the website.
