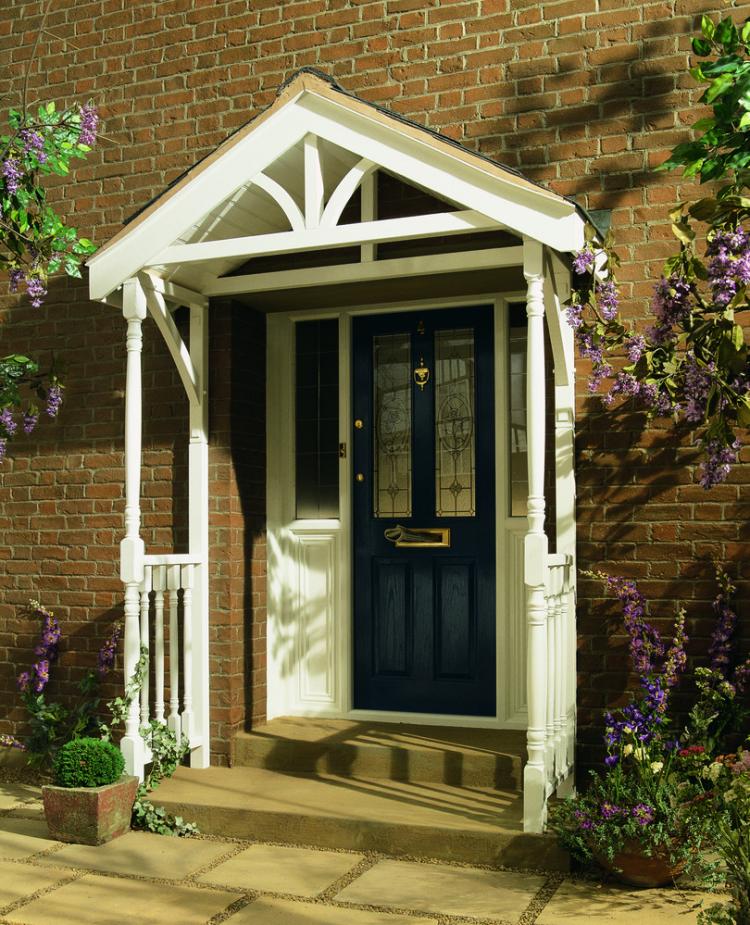
Door canopies are the ideal solution for protecting the exterior of your property.
From providing shelter on a rainy day to boosting your property’s kerb appeal, door canopies boast a range of practical functions. However, paying a contractor or local joinery service to construct a canopy isn't cheap. Most people don't realise that it's quite doable to build a door canopy themselves.
Below are some simple instructions to guide you through your first canopy project; but first you will need some tools and essential materials to get the job done:
Recommended Tools:
- Saw
- Hammer
- Tape
- Bucket
- Trowel
- Ratchet Set
- Power tools
- Ladder
- Stapler
- Lead beater.
Recommended Materials:
- Porch Canopy Kit
- Timber
- Roofing felt, shingles, tiles or sheet roofing depending on your finish
- Cement
- Sand
- Tile baton
- Varnish
- Matchboard V-Jointed
- Galvanised nails
- Heavy-duty staples
- Breathable membrane roof underlay
- Aluminium nails
- Code 4 lead
- Fascias and soffits
- H-Clips.
Please be careful when using power tools and climbing ladders. Always read the manufacturers instructions, data sheets and follow all safety guidelines and best practices.
What Are the Benefits of a Door Canopy Kit?
The main benefit of a door canopy kit is that the timber-work has already been constructed for you. This eliminates most of the complicated carpentry that is typically involved when making a exterior porch roof. You will not be required to cut out any brickwork to fit the canopy brackets, and all components that come with the porch canopy kits that we stock come pre-drilled allowing for easy installation by simply screwing the parts together. All our kits come ready to be painted or varnished, allowing you to personalise the look of your new porch to your own preference. For more information on the general benefits of a door canopy, please see our article here.
Canopy kits also remove other complications like working out roof pitch, fitting rafters and wall plates which makes life so much simpler.
Planning Permission for Door Canopies
In most cases you will not need planning permission to install door canopies on your property. We recommend that you visit the Planning Portal website for more information on building regulations and planning.
How Much Do Door Canopies Cost?
The price of the door canopies and kits that we stock start from £279.00. This does not include galvanised nails, roofing felt, slate and lead.
Door Canopy Help Guide
1 - It's Important To Keep the Canopy Level
It's a high chance that the house you are attaching the canopy to isn't completely level. We recommend that you try to find a hard edge like an outside wall or the entrance to the doorway. Measure equally around the door and take your level from that. If you try to use a spirit level, then your canopy may look a little skewed from the street. Refer to the image below:
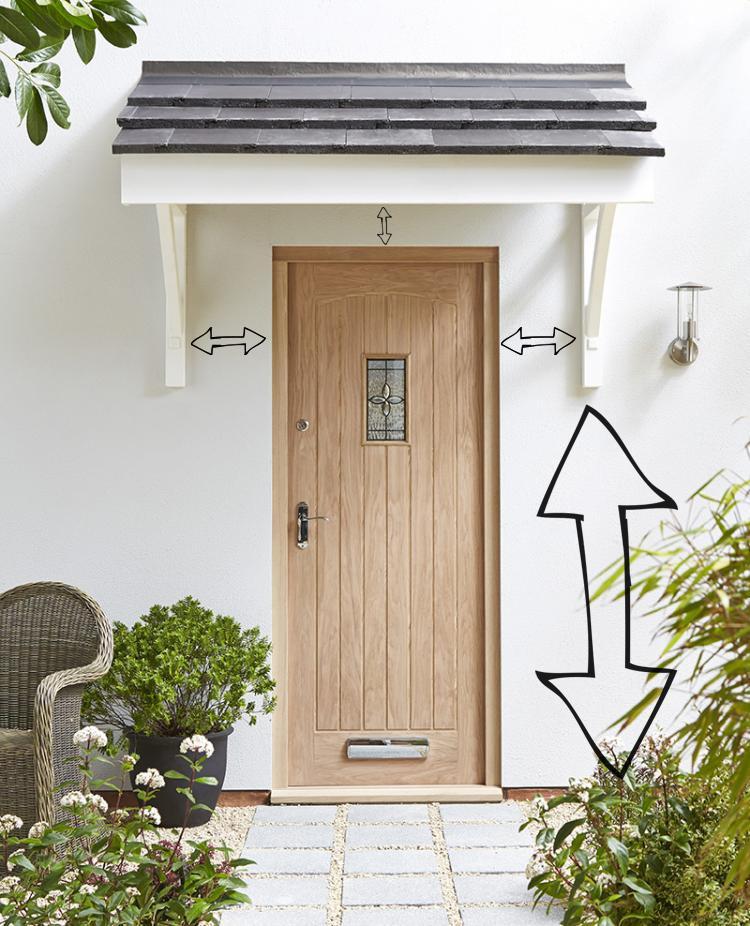
An example of areas of the outside of your home that you can take a level from.
2 - Attaching the Canopy Kit
It's important that you make sure you're fixing the canopy directly to brickwork and remove (and render) plaster or cabling that may be in the way.
Transfer the pre-existing holes in the canopy frame onto the wall. Drill and attach the canopy to the wall using sleeve anchors. Sleeve anchors are designed for optimal performance in concrete, brickwork, blockwork and stone. They can be quite stubborn to fit but use a hammer to get them into the wall and then use a ratchet to tighten.
3 - Attach the Matchboard
The underlay will need to be attached to a solid base. Mark the position of the rafters onto the matchboard so you can nail them in. Place the matchboard with the v-joint facing downwards, so the upper surface is completely flat. Nail them firmly into position with 50mm galvanised nails.
4 - Attach the Underlay
Measure the underlay to hang over the gable ends by a couple of inches. Starting from the bottom (where the gutter will be) fix the first length of underlay. The subsequent layers should overlap each other by 150mm to stop water ingress. Likely, you will only need 2 or 3 sheets for a small roof like this one. Fix the underlay gently with galvanised nails ensuring you don't damage the membrane.
Please note, depending on the design of your canopy roof you may want to fit fascias and soffits so at this stage ensure you leave some loose membrane at the gutter end for more comfortable access.
5 - Attach the Roofing Battens
The battens should run perpendicular to the rafters. The spacing in between the battens (or gauge as it is sometimes known) is dictated by the type of tile you are going to use. Here I will use a standard tile.
Take two tiles and two battens and place them on the roof. Don't fix them into position. Place the two tiles, so they are overlapping and comfortably sitting on the batton grooves. The manufacturer's recommendations also dictate the overlap of the tiles but usually its 75mm. However, several weather factors can change this measurement. For more information, always refer back to the supplier.
Because of the way the tiles overlap, you will always have to tile from the gutter upwards. The first tile should overhang the roof by 50mm at the gutter end so water can run off into the drain.
With a standard 75mm overlap in tiles, the batton spacings should be 33.5cm. Fix the batton with galvanised nails that penetrate the batton and the membrane a minimum of 40mm.
6 - Fit the Tiles
Nail in the bottom row of tiles into the battens. Ensure you do not go through the membrane and only into the batten. Every third row from the bottom tile needs to be nailed, and the very top row needs to be nailed. For a small roof like this, you will likely only need a maximum of 3 rows.
Ensure the tiles overhanging by 45-50mm at the outer edges.
Additionally, if your tile has a curved profile then ensure the tile finishes on the uppermost part of the curve at the overhang.
Watch this helpful YouTube video from Fix My Roof for more information on roof tiling basics:
7 - Attach the Lead
Cut a channel in the mortar or in the brick itself to attach lead flashing to the building. Cut a length of the lead to the desired width and lay it on the roof canopy. Manipulate the lead, so one edge is firmly secured into the groove and fix with wooden wedges or H-clips.
Using a lead beater, from left to right manipulate the lead to follow the profile of the tiles. Of course, this is a lot easier if your tiles are of a flat profile.
Finally, point up the groove with mortar.
8 - Finish the Wood
The canopy materials that we supply arrive with no treatment on them. To prevent your canopy from rotting , you will need to treat the wood with a varnish. You can buy this from any hardware store.
9 - Fit Facias and Soffits
As mentioned earlier in this article, depending on the style of the canopy, you will want to fit fascias and soffits.
Place the soffits under the rafters at the gutter end and place eaves protection boards under the roofing membrane. This prevents ponding by allowing rainwater to run off into the gutter.
Fit ventilation strips to the upper edge of the fascias and then attach the fascias to the rafter ends.
Porch Canopy Kits by Blueprint Joinery
Transform the exterior of your home and provide some welcome shelter on rainy days with our range of porch canopies and accessories. With a variety of styles and designs including turned and straight sides which can be teamed with either a flat or slanted roof, and an optional finial for a decorative touch there really is something for everyone.
All components come pre-drilled allowing for easy installation by simply screwing the parts together. The kits also come ready to be painted or varnished, allowing you to personalise the look of your new porch.
All porches are manufactured to the highest standard and are tested by an independent structural engineer, so you can be rest assured your porch will last for years to come.